At the end of editing a CRF draft spreadsheet, a user with access to the Architect module and security role permission Upload Draft can upload it back into the Rave database from where it was extracted, or upload it to a separate Rave database to update the existing draft, or create a new one. The Architect Draft Spreadsheet can be updated with all objects in a CRF draft or it can be uploaded with specific objects of the user's selection. Once a draft is uploaded, a user can maintain it in the Architect module.
To learn more on how partial uploads are done, see Partial Uploads.
There are three types of upload:
Overwrite
If a Project or Draft combination exists in the target database and the CRF Draft Setting DeleteExisting is set to TRUE, the existing draft in the target database is deleted and replaced with the content of the spreadsheet.
Draft Merge
If a Project or Draft combination exists in the target database and the CRF Draft Setting DeleteExisting is set to FALSE, the data that is being uploaded is merged into the data that already exists in the database. During this merge, content in the spreadsheet takes precedence and overwrites the draft content.
New Draft Creation
If a Project on the spreadsheet (on Draft worksheet) exists in the target database, but the Project/Draft combination does not, the system will create a new draft in the specified Project or if a Project on the spreadsheet (on Draft worksheet) does not exist in the target database, the system will create a new Project and Draft with a default Live Study in the target database.
Note: The type of upload is not determined by the user. The system determines the upload type by examining the content of the CRF Draft spreadsheet and the data in the target database.
Navigate to the Architect main page from the list of installed modules on the Home page.

Click the Upload Draft button.
The Upload Draft main page will appear.

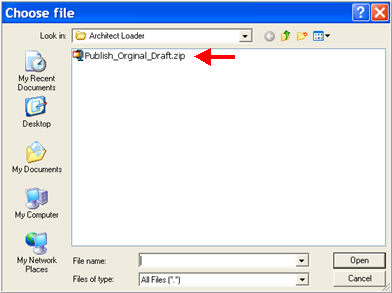
Click the Browse button and locate the CRF Draft spreadsheet that you want to upload into the target database.
Check box the Save Upload History for Rollback. This option saves the history of the upload so that you can at a later time roll-back the upload. It is checked by default. You may uncheck this option.
Note: When Save Upload History for Rollback is checked, the upload process may slow down considerably.

The system will begin uploading the objects in a CRF draft with the data on the spreadsheet. The system determines the project and draft to upload based on the information in the CRF Draft tab.
Note: Data on the spreadsheet is uploaded into the specified locale on the spreadsheet. The locale on the spreadsheet is a custom property defined for the file. In Excel, see File>Properties>Custom.
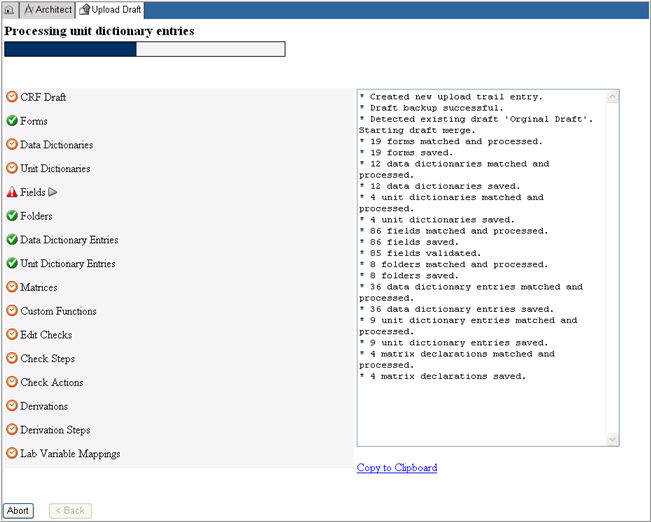
A process page will display the current progress of the upload while the data is being uploaded.
A progress bar will indicate the status of the object that is currently being uploaded.
Icons will indicate the status of the object that is being uploaded:
![]() - indicates an object type that is yet to be uploaded
- indicates an object type that is yet to be uploaded
![]() - indicates the object type has uploaded successfully
- indicates the object type has uploaded successfully
![]() - indicates the object type encountered an error
- indicates the object type encountered an error

To stop the upload process at any time during the upload process, click the Abort button. The process will stop and any data that has already been processed will roll back.
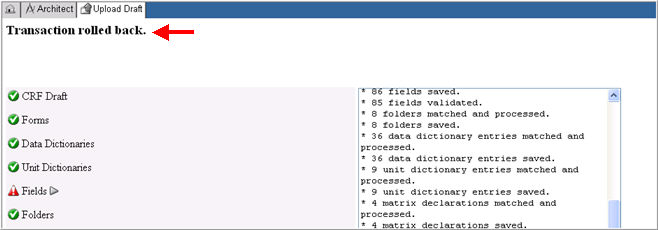
During the upload, the system will check the validity of the data entered. It will use the same validation rules as in Architect for all objects on the spreadsheet. If the system encounters a validation error, the upload process will fail and the operation will rollback, that is, any previous values in the draft will be retained (as in the example below).

Note: Only a draft in which all objects and object references are successfully validated will be uploaded to the target database.
If a rollback occurs, the upload progress page will display the error conditions. The error list is collapsible.

To fix the errors, you must return to the CRF Draft spreadsheet and modify the entries before uploading the spreadsheet again. To return to the Upload Draft main page, click Back.
To roll- back at a later time, navigate to the Draft Detail page and in the Draft History section on the page, select and check box the upload you want to roll back.
When a successful upload occurs, the event log will include any warnings and any non-rollback events.

Click Copy to Clipboard link below the event log to copy the text in the event log to a text editor.
Note: When a roll back occurs, the Event Log and the Copy to Clipboard link will not display. This is because the log is irrelevant as no modifications occurred in the database.
To understand when errors and warnings occur in the upload process, please see Related Topics.
The Architect Draft Spreadsheet can be uploaded containing all objects or can be uploaded containing specific objects of the user's choice. This selective or partial upload is useful when the purpose is to copy, for example, specific forms, fields, and dictionaries from one draft to another and leave the rest out of the upload.
A partial upload is done by removing any worksheets that are not required for the upload. For example, to upload only Custom Functions, all other worksheets but the Custom Functions worksheet and the CRF Draft worksheet can be removed from the draft. The CRF Draft worksheet is required for all uploads.
Note: When uploading the draft spreadsheet, either no edit check related worksheets should be included (Edit Checks, Edit Check Steps, Edit Check Actions) or all three should be included. If only the Check Steps or Check Actions worksheet are included, it will result in duplication because the objects lack identity columns. If only the Edit Checks worksheet is included, it will be overwritten.
Partial uploads can only be conducted during a draft merge.
All worksheets are required if a new project, Global Library, or Draft will be created during the upload process. Worksheets may be left empty if required, so long as they exist in the spreadsheet.
Using Excel tools, do one of the following:
Delete all object worksheets such that only the worksheet (s) to be uploaded and the CRF Draft Object worksheet remains.
Create a new Excel file and copy the CRF Draft object worksheet and all other required worksheets into this new file. The file must be saved with an .xml extension. The filename may include spaces, hyphens, or underscores.
Note: When copying objects from one spreadsheet to another, links may be formed between the two spreadsheets. Spreadsheets containing links cannot be uploaded. Remember to remove all links prior to uploading a spreadsheet. To remove links, use Excel menu path: Edit>Links
Copyright © 2014 Medidata Solutions, Inc. All rights reserved.