A Form is an electronic equivalent of a paper-based Clinical Research Form (CRF). It contains one or more data points, or fields, where data is entered. A form can be created as a new item or it can be created based on a pre-existing form.
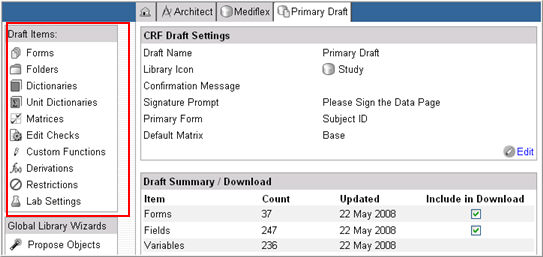
Navigate to Architect > Project or Global Library Volume.
Select a Draft.
Click Forms from the list of Draft Items.
The form page appears showing a list of forms (if any) for the Draft.
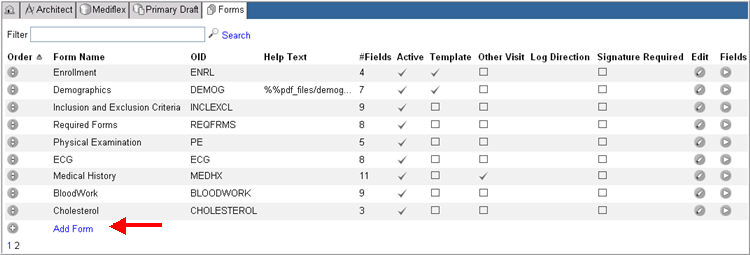
Click ![]() Add Form. A drop list of existing forms together with options to place the new form at the top or boom of the list appears.
Add Form. A drop list of existing forms together with options to place the new form at the top or boom of the list appears.
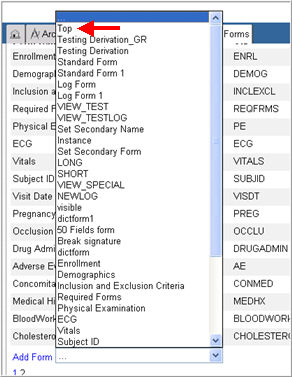
Select Top or Bottom to place the new form at the top or the bottom of the Form Name list.
The Form page displays empty fields to define the new form.

Enter the following information (as required):
Form Name - name of the form that the end user sees in the EDC module
Operational Identifier ( OID) - unique identifier for the form. The OID must be a minimum of 1 alphanumeric character, a maximum of 50 alphanumeric characters, with no spaces or special characters
Help Text - help text for the field that the end user sees in the EDC module.
#Fields - Number of fields is set to 0 for a new form by default and cannot be edited.
Active - Active is checked by default. When the field is checked and draft is published and pushed, the form is available in EDC. When unchecked, the form is considered "inactive" and does not show in EDC when the draft is published and pushed.
Template - When checked, the form is assigned as a template form in EDC. For more information, see EDC help. Template is unchecked by default.
Note: In view mode, the Template column will not display unless any of the forms listed on the Form Page has a value other than the default value for the Template column.
Other Visit - The Other Visit box is checked automatically if any fields on the form are configured to show previous visit data.
Log Direction - Select Landscape or Portrait from the dropdown to set the display mode. To have this option display in selection mode, you must have a field for the form assigned as a log field.
Signature Required - when checked, the form is required signature for all data points that have been submitted.
Note: If a field is marked for signature in a form (eSigPage, eSigFolder, eSigSubject), you cannot select the Log data entry checkbox or the Requires Translation for that field.
DDE - select Always, As per site or Never. The form defaults to Never.
Note: A form set to Always (MustDDE) will always display in DDE but not in EDC unless it has been through DDE. A form set to As Per Site (MayDDE) will display in EDC but not in DDE if the site is NOT flagged as a DDE site in the Site Administration module. A form set to Never (MustNotDDE) will always display in EDC but not in DDE.
Note: The DDE column will ONLY be visible in View mode if the user has User Group permission to the DDE module and any of the forms listed on the Form Page has a value other than the default value for the DDE column. The default value for the DDE column is "Never".
Patient Cloud Form - New for Rave 2014.2.0, when checked, the Patient Cloud form is visible in both EDC for site personnel and through a Patient Cloud device for patients to enter related data. When unchecked, the form is only available in Rave EDC.
Note: The Patient Cloud check box only displays when Patient Cloud is activated on your Rave URL. For information, contact your Medidata representative.
Save Confirm - When checked, the Draft Message or Confirmation message displays at the top of the form in EDC when the end-user saves the form. Save Confirm is checked by default.
Set the Redirect To to No Link, Link Next, or Link Custom. Only one option can be specified.
Note: The Save Confirm check box and the Redirect To options will only display if you have configured a message in the CRF Draft Settings on the Draft Main page.
Click Update ![]() .
.
To add more forms repeat steps above.
Navigate to Architect > Draft > Draft Details.
Click Forms on the list of Draft Items.
Search and locate a form in the list that you want to edit .
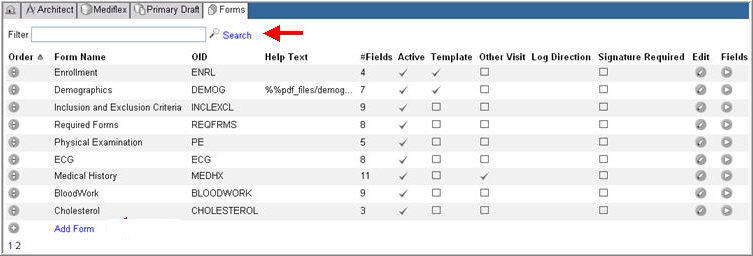
The system displays the form you want to edit.

Click Edit![]() .
.

Note: The DDE column will be visible in edit mode irrespective of the user's User Group permission to the DDE module.
Make changes to the Form as required.
Uncheck or check the Active check box to inactivate or activate the form.
Click Update ![]() .
.
Note: A form once created with fields cannot be deleted. It can only be inactivated. Note also that a form cannot be deleted if it contains a field. Thus, all fields in a form must be deleted and the form inactivated before that form can be deleted and removed from the list of forms for the draft.
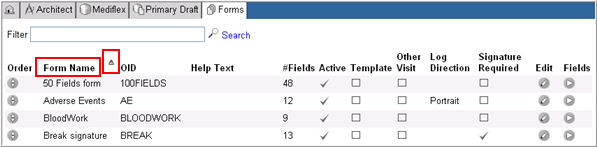
Click the Form Name column header to sort the forms alphabetically by name and to toggle between ascending and descending order.
Click the OID column header to sort the forms alphabetically by name and to toggle between ascending and descending order.
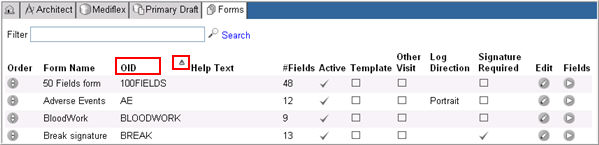
A Filter icon ![]() (descending) or
(descending) or ![]() (ascending) will display next to the column label "Form" or "OID" to indicate type of sorting.
(ascending) will display next to the column label "Form" or "OID" to indicate type of sorting.
The order of the Forms in the list represents the order of the forms as they will appear within their respective folders. Click the Order label to display the forms in ordinal order or click again to show in reverse order.
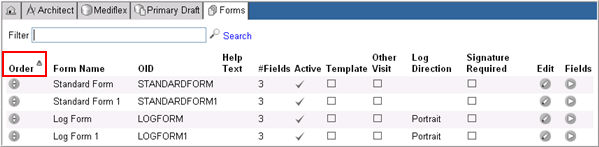
A Filter icon ![]() (descending) or
(descending) or ![]() (ascending) will display next to the column label "Order" to indicate type of sorting.
(ascending) will display next to the column label "Order" to indicate type of sorting.
Note: The reverse order of forms will not be saved from session to session. This also applies to alphabetical sorting by Form or OID.
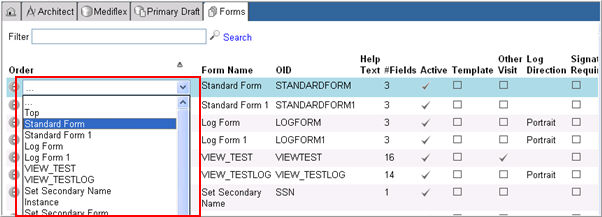
To reorder the list of forms, click the reordering arrows ![]() to the left of each form entry. A field-placement drop down list will appear. Specify the new location of the form - Top of the Form, Bottom of the Form, or select a Field Name to place the field directly below the field you have selected.
to the left of each form entry. A field-placement drop down list will appear. Specify the new location of the form - Top of the Form, Bottom of the Form, or select a Field Name to place the field directly below the field you have selected.
Once a form is created, fields may be added to it. See Form Designer to learn how to create a field on a form.
![]()
Copyright © 2014 Medidata Solutions, Inc. All rights reserved.