Publish Checks enable you to publish changes to edit checks, custom functions, or derivations within an existing CRF version outside of the more comprehensive migration process. The changes are made immediately to the selected CRF version. You can then schedule to run the edit checks, derivations, or custom functions to run on all subjects.
You must have the following security role actions to make changes to objects in Publish Checks:
Amendment Manager Plan
Amendment Manager Execute Aux
Amendment Manager Execute Prod
Note: The following conditions hold true when you publish changes to edit checks, derivations, or custom functions:
You cannot publish the <object> to a current CRF version that is being used in a migration plan with a job status of "scheduled" or "in process".
Both current and reference CRFs must be published versions of CRFs. Drafts are not supported.
Current and reference versions of the CRFs cannot be the same.
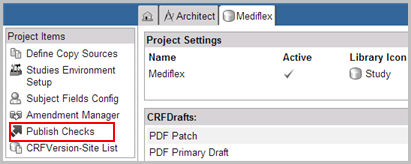
Select a project on the Architect main page and navigate to the Project main page.
Select Publish Checks link from the list of Project Items on the left navigation pane.
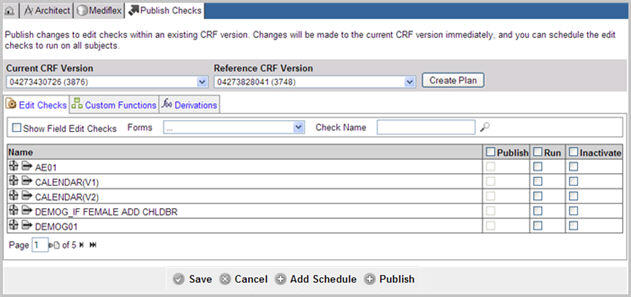
The Publish Checks page displays.

Select a Current CRF Version from the drop down list. The current version is the version you want to make changes to.
Select a Reference CRF Version from the drop down list. The reference version is the version where you have the changed objects.
Click Create Plan.
A valid plan is created. Three tabs display: Edit Checks, Custom Functions, and Derivations. A list of each object appears in a table, with check boxes for Publish, Run, and Inactivate as appropriate. Edit Checks display by default. In addition, Edit Checks and Derivations have an option to filter the objects that display in the list table.
(Optional) Check box Show Field Edit Checks to include field edit checks in the list.
(Optional) Select a form from the Forms drop down list to show only Edit checks or Derivations assigned to the selected form.
(Optional) Enter an edit check name or a derivation name (if known) in the Check Name or Derivation Name text field, as the case may be, to see only the named edit check or derivation in the list.
Click Search ![]() to filter results in the table based on your selections.
to filter results in the table based on your selections.
In the list table, click the ![]() icon next to the <object> Name to view the infix notation in current edit check, derivation, or custom function or click the
icon next to the <object> Name to view the infix notation in current edit check, derivation, or custom function or click the ![]() icon to view the infix notation in reference edit check, derivation, or custom function. This allows you to view changes, if any, and determine if a certain object should be run after migration.
icon to view the infix notation in reference edit check, derivation, or custom function. This allows you to view changes, if any, and determine if a certain object should be run after migration.
Select an <object> you want to publish and check box Publish in the row to publish and run the edit check, derivation, or custom function from the reference to the current CRF version. The check box is disabled if there are no objects in the current version.
Select an <object> and check box Run to run the existing edit check, derivation, or custom function in the current CRF version at the scheduled time.
Select an <object> and check box Inactivate to change the active status of an edit check, derivation, or custom function. You may consider to inactivate an object when the object is acting errantly.
After making all selections, click Save ![]() to commit the changes to the publish plan and save any updates made to the selected edit checks or derivations.
to commit the changes to the publish plan and save any updates made to the selected edit checks or derivations.
Click Publish ![]() to run the publish plan. You will be asked to confirm if you want to run the Publish Checks plan.
to run the publish plan. You will be asked to confirm if you want to run the Publish Checks plan.
Click Yes to save the Publish Checks plan. The system saves the Publish Checks plan, generates a Job ID, and returns a confirmation message. The changes to the current CRF affect all subject activity within the selected edit check, derivation, or custom function at the scheduled time. The changes are run in all sites in all environments where the current CRF is in use. The Publish Checks job can be tracked in the Amendment Manager Job Results page and the Results Details page.
(Optional) Click Cancel ![]() to cancel the current selections and return to the previous settings.
to cancel the current selections and return to the previous settings.
Note: The following conditions hold true when you save the plan:
If an edit check or derivation is inactive or deleted, the system closes all markings that have been opened by the object.
If an edit check that calls a custom function is inactivated, the system closes all markings that have been opened by the custom function.
If a check runs against a subject and fails, the system rolls back after each failure and writes the error to the error messages table. If more than the configured number of errors occur, the errors display in the Results and Details page for the subject.
Locked messages can be restored from the Restore button on the Migrations Details page.
The system creates an Architect Loader spreadsheet of the current CRF prior to publishing the changes. This spreadsheet is available for download from the Project Draft page in Architect.
The system ignores any Bypass During Migration flag set for each edit check.
You should publish a new or updated custom function along with any associated edit checks even when the edit checks remain unchanged.
To publish edit checks according to a predefined schedule, click the Add Schedule ![]() button.
button.
The Publish Checks Scheduler displays below the Objects table.
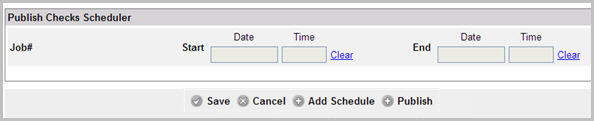
Enter a Start Date and Time. This is the Date and Time when the job schedule must begin.
Enter an End Date and Time. this is the Date and Time when the job schedule must be stopped.
Click Save to schedule the job at the appointed time and date.
Click Publish ![]() to run the publish plan. You will be asked to confirm if you want to run the Publish Checks plan.
to run the publish plan. You will be asked to confirm if you want to run the Publish Checks plan.
(Optional) If required, click Clear to erase the entries and re-enter values.
(Optional) If required, click Cancel to undo the entered values.
To add additional schedules, click Add Schedule ![]() link.
link.
See Schedule Migration for more information.
Copyright © 2014 Medidata Solutions, Inc. All rights reserved.