Users can define view and entry restrictions for subject, folders, forms, and fields based on data status. A study may be customized so that only certain roles have a certain level of access to the different forms and/or fields.
Restrictions are created to:
Prevent certain roles from viewing fields and forms
Prevent certain roles from entering data into fields or forms
Give only certain users the ability to verify information
Give only certain users the ability to review information
Restrictions can be added to a particular form or all forms.
Select and navigate to the Project or a Global Library Volume main page from the Architect main page.
Select a Draft and navigate to the Draft Details page.
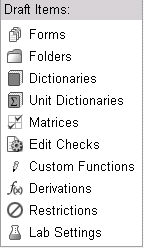
Click Restrictions in the list of Draft Items on the side bar.
The Restrictions main page displays.
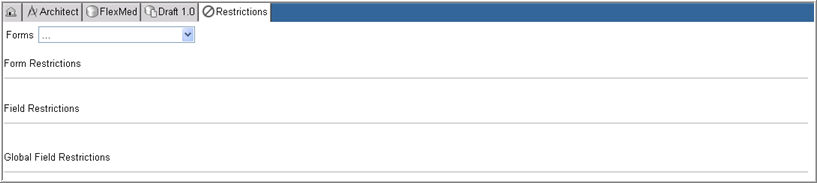
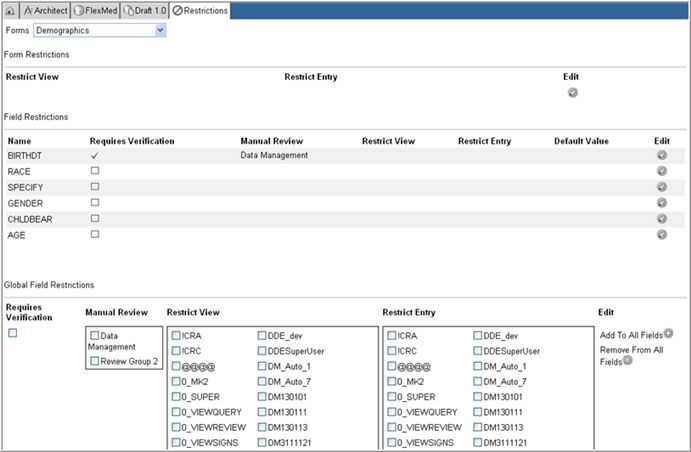
Select a form from the Forms drop down list.
The system refreshes and displays the Restriction settings for the form.
Click the Edit icon ![]() in the Form Restrictions section.
in the Form Restrictions section.
A list of Roles with check boxes displays in the Restrict View column.
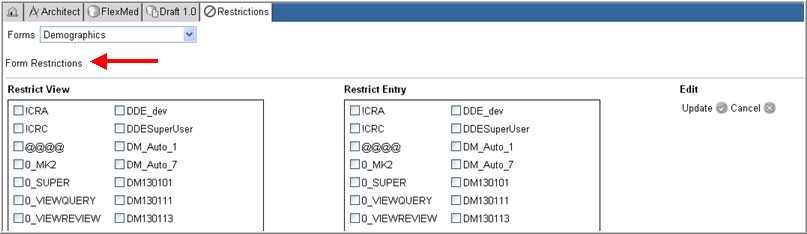
In the Restrict View section, select the role (s) that should not view the form.
In the Restrict Entry section, select the role (s) that should not have data entry abilities.
Click Update ![]() to save your changes or click Cancel
to save your changes or click Cancel ![]() to discard changes.
to discard changes.
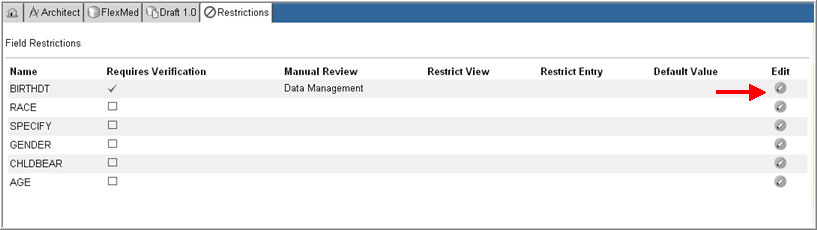
To restrict the view of specific fields in the form, select and click the Edit icon ![]() associated with the field in the Field Restrictions section.
associated with the field in the Field Restrictions section.
A list of Roles with check boxes displays.

The following options are available when adding Field Restrictions:
Role/s can be restricted from viewing data in the field
Role/s can be restricted from entering data into the field
Field can be marked as requiring verification
Field can be marked as requiring Manual Review by a configured Review Group
The previous four options mentioned above can be applied to all fields simultaneously in the Global Field Restrictions section.
A default value for a field can be set.
Check the Requires Verification check box if you want to mark the field as requiring verification.
In the Manual Review column, check the Review Group (s) that you want to give review rights for the field.
In the Restrict View section, select the role (s) that should not view the field.
In the Restrict Entry section, select the role (s) that should not possess data entry abilities for the specific field.
If you wish, you can enter a default value for the field in the Default Value text box.
Click Update ![]() to save your changes or click Cancel
to save your changes or click Cancel ![]() to discard changes.
to discard changes.
To restrict the view of all fields on the Form, make your selections in the Global Restrictions section and click Add to All Fields ![]() .
.
To remove your selections for all fields on the form, click Remove From All Fields ![]() .
.
Tip: Use the Global Restrictions section if the majority of the fields on a form require the same settings. The desired settings can be quickly applied to all fields on the form, and settings for specific fields can be modified using Field Restrictions.
Select a form from the drop down list.
Click the Edit icon ![]() associated with the form in the Form Restrictions section.
associated with the form in the Form Restrictions section.
A list of Roles with check boxes displays in the Restrict View and Restrict Entry columns.
Check or uncheck roles that should or should not view the forms or make entries.
Click Update ![]() to save your changes or click Cancel
to save your changes or click Cancel ![]() to discard changes.
to discard changes.
Select a field you want to edit in the Field Restrictions section.
Click the Edit icon ![]() associated with the field.
associated with the field.
A list of Roles with check boxes displays in the different restriction columns for the field .
Check or uncheck the restrictions placed on the field.
Click Update ![]() to save your changes or click Cancel
to save your changes or click Cancel ![]() to discard changes.
to discard changes.
![]()
Copyright © 2014 Medidata Solutions, Inc. All rights reserved.